Setting Up nbdev
nbdev streamlines software development, testing, and documentation all from Jupyter Notebooks using Quarto and Github actions. We’ll use nbdev to increase AI modeling transparency. To initialize nbdev follow the steps below.
Installation
With PDM properly configured we’ll install all packages with it. Let’s start with nbdev.
pdm add nbdevInitialization
This page was modified from the nbdev End-To-End Walkthrough
Quarto
Before initializing nbdev, we first need to install quarto. Quarto enables technical publishing which will convert Jupyter Notebooks to beautiful documentation. There are two options for quarto installation.
- If sudo privledges are available you may run:
pdm run nbdev_install_quarto- Otherwise, you will have to perform a few tricks:
First download the tarball from github. Make sure the tar file is compatible with your OS, this example uses linux-amd64, but this will be different if on macOS or Windows. Tar files are availble here: Quarto Releases and Assets.
wget https://github.com/quarto-dev/quarto-cli/releases/download/v1.2.335/quarto-1.2.335-linux-amd64.tar.gzNext extract and build the binaries.
mkdir quarto
tar -C ./quarto -xvzf quarto-1.2.335-linux-amd64.tar.gz
Finally, provide a link to the binaries in the environment, so the interpreter recognizes this installation.
ln -sr ./quarto/quarto-1.2.335/bin/quarto ./.venv/bin/quarto(If the environment was configured differently on the previous page, the destination will differ)
To ensure properly installation run:
pdm run which quartoFrom here you may delete the tarball:
rm quarto-1.2.335-linux-amd64.tar.gzInit
With Quarto installed, now initialize a nbdev repo by entering:
nbdev_newThis will ask for project metadat information that can always be edited in the settings.ini file. Then commit and push the new changes to GitHub.
git add .
git commit -m 'Initial commit'
git push
Github Pages
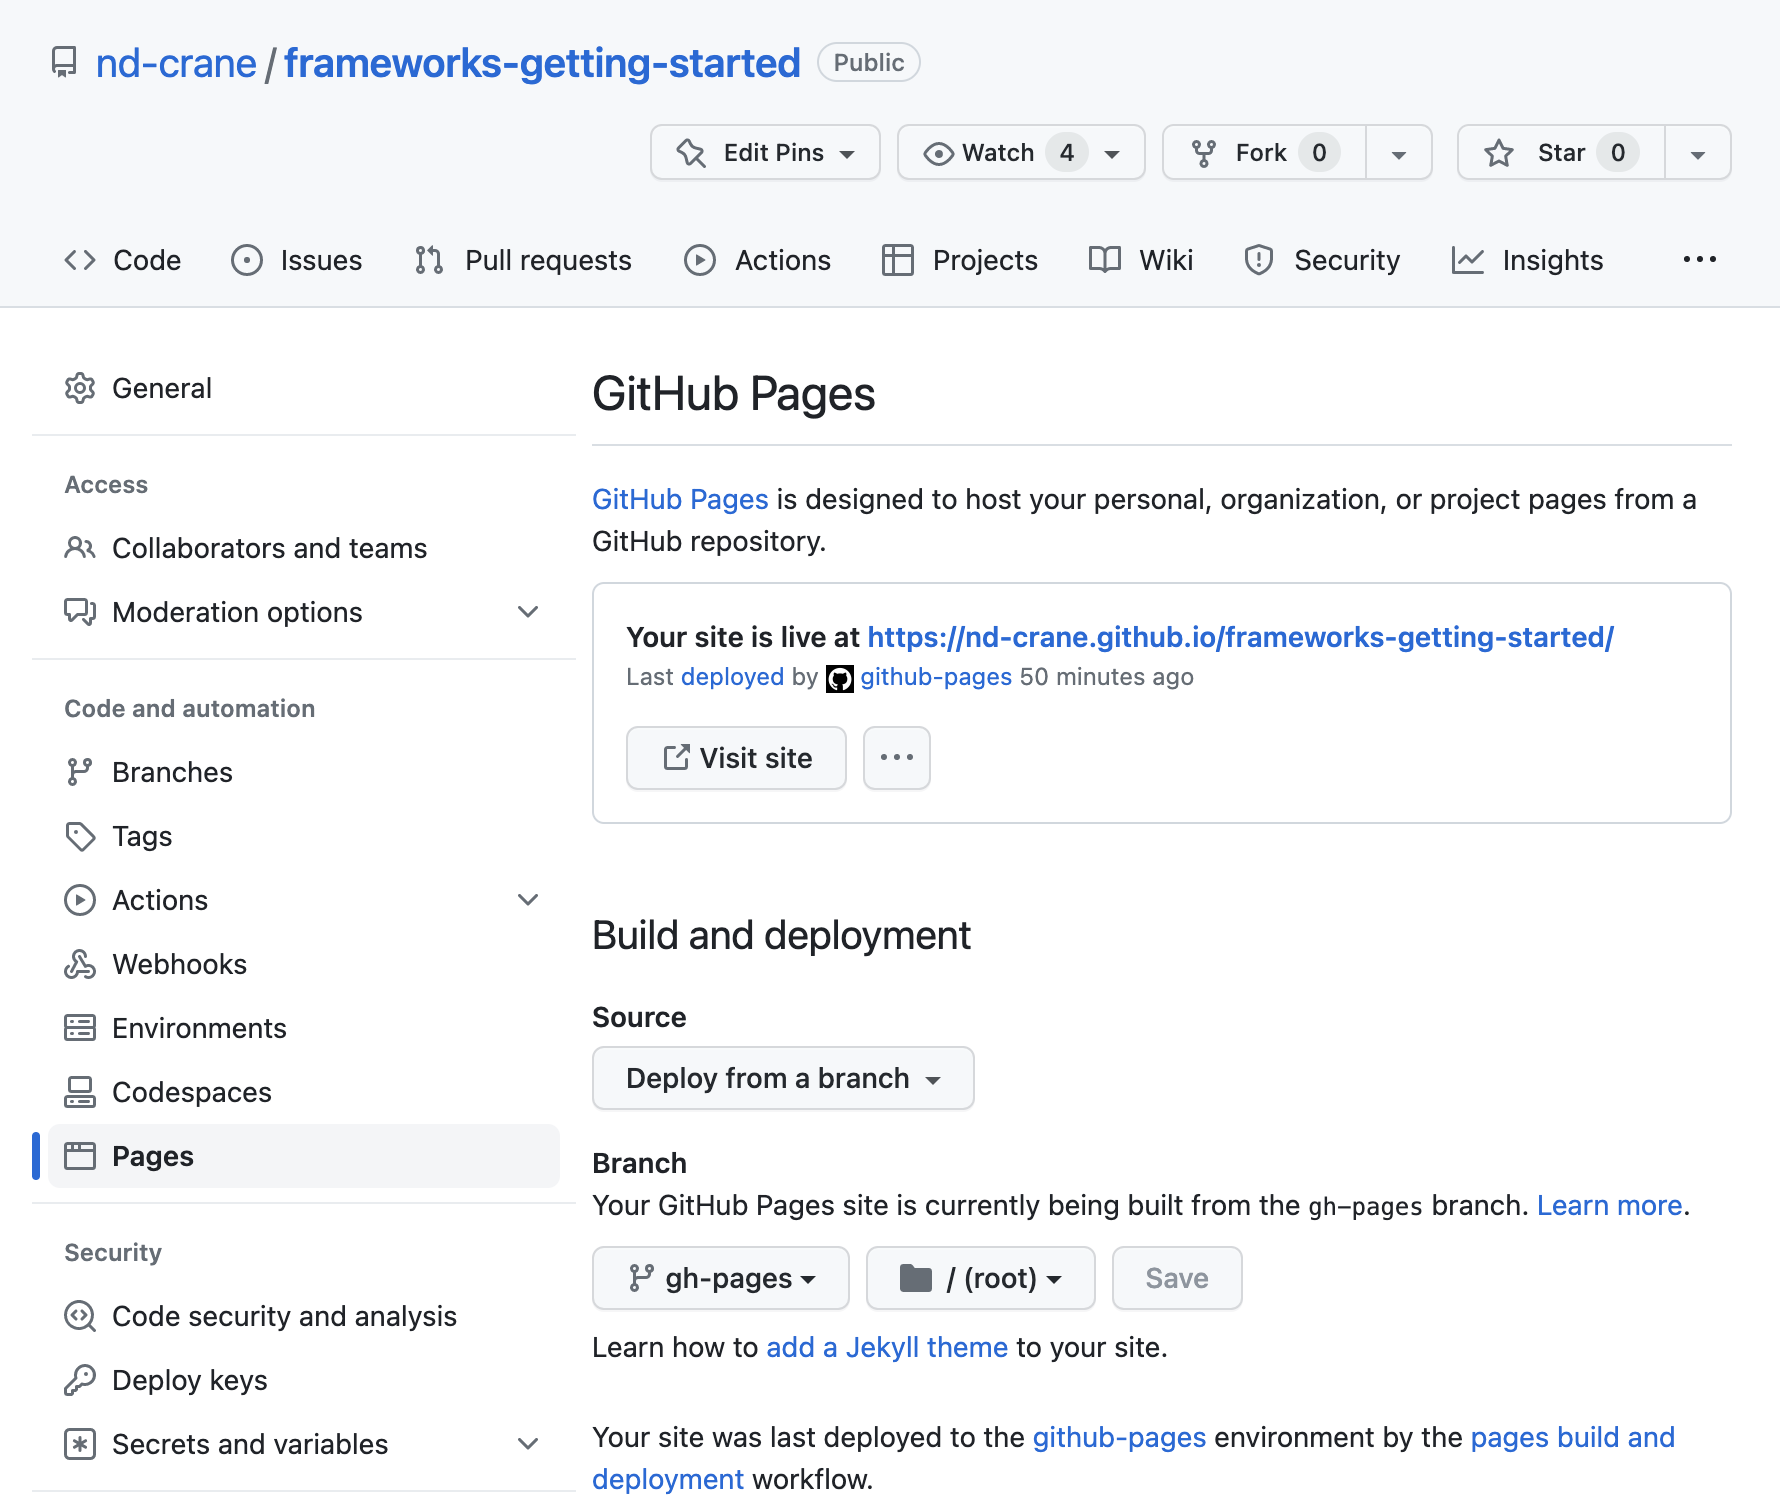
Github pages should be enabled to host the generated documentation. In GitHub click on the “Settings” tab near the top-right of the repo, then “Pages” on the left, then set the “Branch” to gh-pages” and click “Save”.
It should look like the following:

Workflows
On push, nbdev runs two workflows on your project. Here’s a description from the nbdev End-To-End Walkthrough:
What do these workflows do?
- CI - The CI (continuous integration) workflow streamlines your developer workflow, particularly with multiple collaborators. Every time you push to GitHub, it ensures that:
- Your notebooks and libraries are in sync
- Your notebooks are cleaned of unwanted metadata (which pollute pull requests and git histories and lead to merge conflicts)
- Your notebook tests all pass
- Deploy to GitHub Pages - Builds your docs with Quarto and deploys it to GitHub Pages.
If these run correctly you will see a green check (✅) next to each run. If not you will see a red cross (❌). In this case, click on the cross to see what failed.
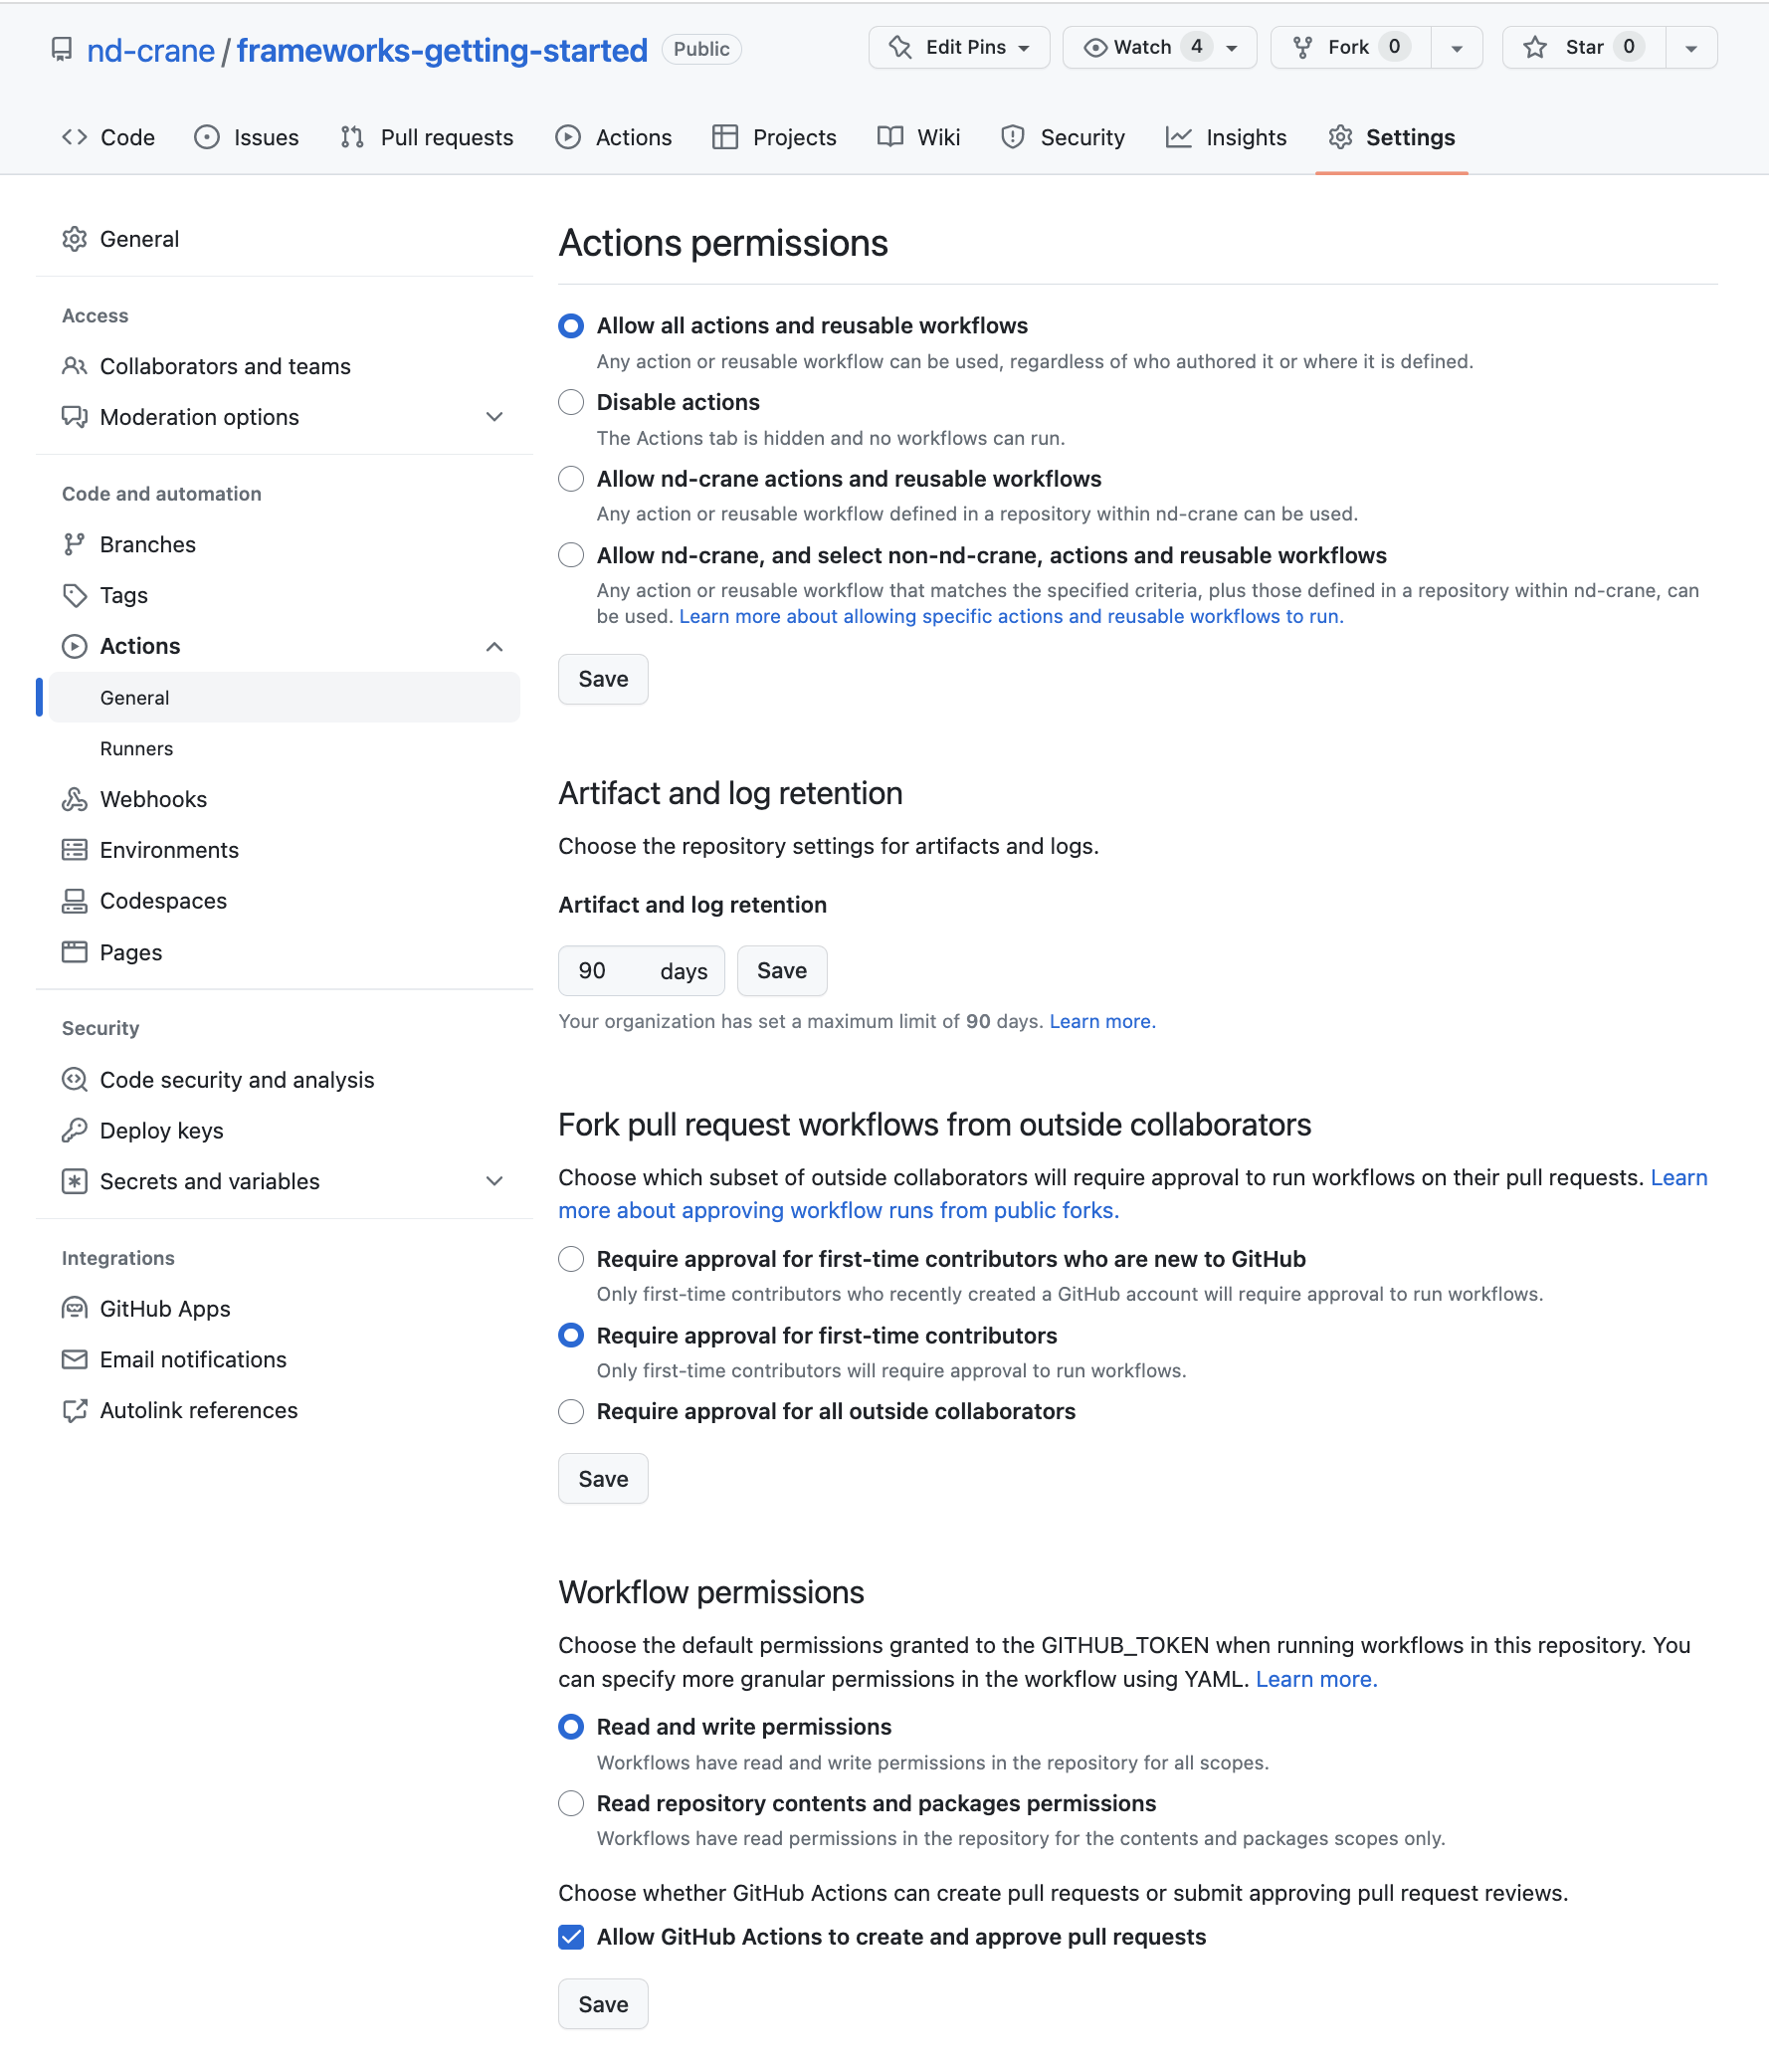
In some cases you will need to give Workflows “Read and writer permissions. To do this click on”Settings”, go to the “Actions” tab, click “General”, scroll to “Workflow permissions”, then select “Read and write permissions”, finally click “Save”. Here’s a screenshot for refrence:

The generated docs can be viewed at https://{user}.github.io{repo}
Developing Docs
When working with Jupyter notebooks it is necessary to install nbdev’s hooks to avoid merge conflicts.
pdm run nbdev_install_hooksFrom here, documentation can be developed in jupyter notebooks and will be generated on push.
index.ipynb
nbdev will automatically create an index.ipynb file. This will become the documentation home page and README.md.
Pushing to GitHub
Before commiting changes run pdm run nbdev_prepare. This will perform the following actions:
pdm run nbdev_export: Builds the .py modules from Jupyter notebookspdm run nbdev_test:Tests your notebookspdm run nbdev_clean:Cleans your notebooks to get rid of extreanous output for Githubpdm run nbdev_readme:Updates README.md from your index notebook.
Finally push to GitHub